Showing posts with label We Made It. Show all posts

Friday, November 7, 2014

Senor Crosby's Fiesta!

CONFESSION: Let's just preface this blog post with the fact that I basically FORGOT to take any pictures of the decorations at the party or before so many of the pictures were the next morning...so you won't even get the full effect but ehhhh, you'll get the idea.  Also sorry for the extra grainy iphone shots! A few posts ago, I showed you the invites & said that it was a fiesta theme so I went heavy on the pinata type fringe.  I made the cupcake toppers, the sopapilla toppers (seen below, I got no action shots of them...), and the fringe banners.  I hung several other banners and had some serapes placed about that ordered from a party supply company and my mom had some pinatas made for the party. 

Pre-party DIY-ing 


This guy was actually next to the front door, but the wind
was blowing like crazy so he had to move indoors.


Crazy hurr, don't currr. I promise his hair was somewhat "done"  before
he started running around like a crazy person. 

Sweet Cousins!

Post cupcake. 


Monday, October 27, 2014

Open Shelving

It's been awhile since I have given you an update on Casa Montgomery....probably because not much has been updated since I have been back to work, oooops haha! We have had weddings, showers, or some sort of party nearly every weekend since August and between that and working, haven't had alot of time to devote to renovating. BUT the grout has been completed and our open shelving is now up! Here are some pics of the shelves going down to refresh your memory (sorry for the awful grainy pics).


I forget how bad it was before...okay fine not bad but just builder-y.  Ewww. Those counter tops and that backsplash. So remember since this we have painted (adios builder beige and my chalkboard wall), knocked out the backsplash, re-dry walled , put up new tile backsplash and installed concrete counter tops. Here are a few of our inspiration photos of how we wanted the white subway tiles & open shelving to look like.

gray cabinets, white subway tile with dark grout, open shelves
Via Pinterest
Lovely kitchen
Via Houzz
Via Modern Findings 
grey stained oak cabinets + shelving
Via VT Interiors

And without further adieu, here is what they currently look like: 


Okay sort of...I didn't get a picture of the whole space and things aren't exactly in their place right now, but at least you get a "work in progress shot."  We are still needing to buy new plates/glassware to display, and those cute new canisters aren't in their permanent home (plus the hubs already dropped and broke a lid...I think they lasted a full week in our house before that happened!) Below are a few items that we have been eyeing to put up there....

Latte Bowls #anthropologie
Anthropologie


Wednesday, July 30, 2014

Crossing a Few Things Off the List

**WARNING** All the pictures you are about to see are terrible/in progress shots, just wanted to warn you so that you didn't think you were seeing anything great haha! I am waiting to take really great pictures when we are finished or at least finished enough that there aren't tools/dust/blue tape/etc everywhere. So here's what was on our list (I may have forgotten a few) of things to change for Phase 1  as we are calling it:

PHASE 1
Repaint
New Baseboards
New Crown Moulding 
Move TV (therefore fix the giant holes in the wall that it's being removed from)
New Couch
New TV Credenza
New Chair
New Rug
Knock out old backsplash
Hang New Backsplash 
Concrete Countertops over existing
Make an island for the kitchen
New Kitchen/Dining Light Fixture (Still Needs to be hung)
New Sink & Faucet
Fill in Door to Office/Playroom
Knock out a new entrance to Office Playroom
New Dining Table & Chairs

This amazing new door will be the new entrance into the office/playroom (those stripes will be gone)


In progress shot of the kitchen island…this is going to have its own post that I am dying to show you!


Paidge Sofa from West Elm

Cros reading in the new chair…its an AWFUL pleather-vinyl fabric that we are eventually going to have recovered but we are enduring for now.  This came from Lula B's West

New Mid-Century Credenza from Scout…again better pictures to come (always watching Real Housewives of NY)

Got more of the backsplash hung & we are almost ready to grout.  I had to post this pic of our "high tech" spacers aka toothpicks torn in half! 

Tuesday, July 1, 2014

More Updates on Casa Montgomery

We have crossed a few more things off our list of updates to Casa Montgomery.  There are three countertops that are complete with concrete (3 layers of concrete, 3 layers of sealer), one side of backsplash that is hung (still needs to be grouted), and all of the new baseboards in the entry, living room, & kitchen/dining are put up (those still need to be caulked.) 

Detail of sealer drying on countertops

Bar Top complete

Detail of finished concrete


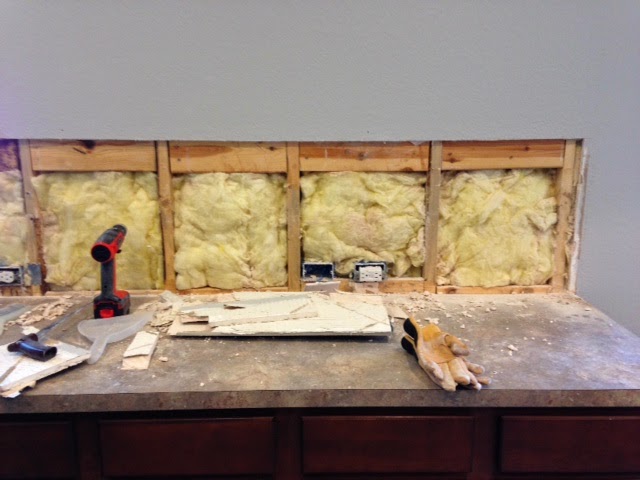
The tile went up over the existing tile backsplash on this side due to the fact that the existing tile was literally grouted to the cabinets.  We didn't want to risk damaging the cabinets so we did some research and found out you can in fact tile over tile.  Instead of using thin-set, you use a glue adhesive.


Side one complete!


We are making some progress finally! Up next: new sink/faucet, concrete on the last (& biggest) countertop, new backsplash on the other side of the kitchen, grouting said tile, caulking baseboards, painting then hanging crown molding. 


Wednesday, June 18, 2014

House Updates

So nothing glamorous to look at or anything, but here are a few updates to our casa.  We have painted {twice} the entry/living room/kitchen/dining rooms.  We started out with builder beige and had two accent walls then covered that up with a pale gray….well that gray took on too much of a blue tone once dried and paired with cabinets/furniture and everything.  SO we ended up taking the gray from the accent walls we had & lightened it up significantly.  We already knew that tone worked in here, we just wanted a lighter version of it to make the room look bigger.

In the kitchen, we got all of the old backsplash knocked out and the new drywall up where the wall was damaged.  The new baseboards are being painted, and we have tested out the concrete on one section of the countertops.  More to come…


You can see in the pictures that there is literally CRAP everywhere….this is a major downside of tweaking your house but I guess on the flip side, I don't have to worry about doing my usual weekly cleaning haha! Just constant swiffering of the floors…